What is Beaded Rows/Braid Less Sew In?
Traditionally extensions are installed once the person's natural hair is braided against the scalp, in the direction the extensions are being installed. This braid was the foundation for the hair weft to be installed. The next new wave of extensions were adhesive based extensions in which extensions adhered with a variety of different applications. With the Beaded Row technique, you need neither adhesive nor braids! Not all hair can support the tension of being braided for eight weeks at a time and adhesive can be scary! Instead, opt for the Beaded Row/Braid Less sew in technique its a completely unique method of installation that creates a foundation for the extensions with microbeads or micro links.
Braid less sew ins are also called “flat tracks” or “skip tracks.” The only difference between a Beaded Row and a more traditional Braid Less Sew In is that in a Beaded Row there is an additional thread looping together all of the beads. This additional thread provides extra support for the extensions once installed. After installation the care for the extension is minimal - just follow your normal hair care routine! The Braid Less Sew In is perfect for someone who wants to try something different - one that is both adhesive and pain free! The installation will last anywhere from 6-8 weeks depending on the rate of your hair growth.
Why would someone want a Braid Less Sew In?
A Braid Less Sew In is perfect for individuals whose hair does not stay well in long term braids or who hate the residue left over from other adhesive extension methods. This method is ideal for those ladies who love a glam top knot or ponytail once properly installed the extensions won’t show at all - not even with an Arianna Grande-esque ponytail! The Beaded Row and the Braid Less Sew In methods are completely adhesive free which makes moving them up or removal almost effortless. Additionally, these methods allow for the installation of an extension with the least amount of contact points with the clients own head/hair. The minimal contact points allow easy access to the scalp. As such a client can easily wash and condition without issue. Some feel that the Braid Less Sew In is the healthiest method for installing extensions due to the minimal contact points.
Since there is no adhesive or tape involved there are no limitations on what products can be used on the hair or scalp. With the expertise of your stylist, you can easily dye or tone your hair and extensions together in the same visit! There is no need to visit the salon multiple times to get the hair you’ve always wanted. So reach for that Seriously Smooth oil lady! As long as your still using your favorite Glam Seamless hair extensions you can easily use any hot tool in your arsenal and stay perfectly glam for as long as you want.
Who is a good candidate for this method?
An ideal candidate will have at least 6 inches of hair or more and will not have any signs of consistent traction, alopecia or tension related concerns.
How do you apply it?
Application of a Beaded Row or Braid Less Sew In is super easy just remember practice makes perfect! Below is a list of tools needed and the basic procedure for a braid less sew in. Follow along with our video tutorial here!
Tools Needed:
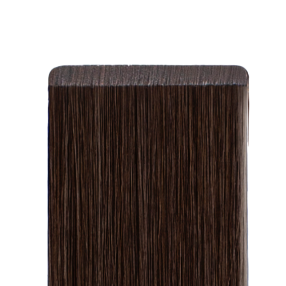
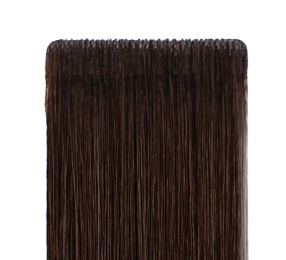
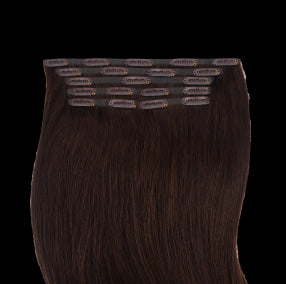
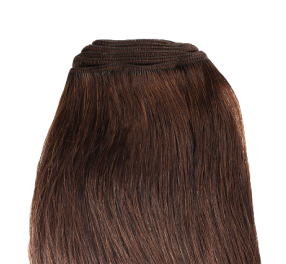
- 1 or 2 Traditional Bundles of Glam Seamless Hair!
- Beads that match your client's hair
- Plier
- Looper
- Duck Clips
- Curved Needle and Thread
Parting
The first thing you need to do is start with super clean sections. There is nothing more important than making sure that your part is as clean as possible and flyaway free! Some stylists start with a horseshoe-shaped section at the crown and others choose to start at the nape of the neck. You may also choose to lightly spritz your sectioning with hairspray and sectioning clips to really keep all flyaways down.
Foundation/Beads
Start by taking your Glam Seamless Looper and preloading it with five microbeads. Our microbeads have a silicone coating on the interior to prevent any excess slippage.
- You want to install beads a half inch apart from each other - as this will serve as your foundation for the extensions.
- You will take the looper and slide the bead onto the hair section.
- You want to have enough hair to provide a base but also enough room for the curved needle to slide through.
- IF there is too much resistance getting the hair onto the looper it is an indication that there is too much hair in your section.
- You then want to take your pliers and slide the bead up toward the scalp to be a snug fit but not uncomfortable. Press down firmly enough to secure the bead but not so tight that your needle won’t pass through.
- Remember to clamp in the direction of the hair growth! You don’t want to tighten the plier while holding the hair up - but rather - whilst holding the section of hair down.
- The Beaded Row technique will also have thread looping each bead together. You will need to string the thread through the beads like a clothesline. This is to reduce the risk of beads sliding down by providing extra support. This would be ideal if a client has very fine/thin hair. Once this is done you will be ready to sew in your weft.
Sew In
Once you go all the way around the horseshoe you are done creating the base and you are ready to sew in your weft. You will need your C shaped or curved needle to install the extensions onto the foundation you have just created.
- Measure and cut the hair weft as needed.
- Remember hand tied wefts will unravel when cut and you will have to reseal those ends. Luckily - all Glam Seamless wets are machine tied and are ready for installation!
- Use duck clips to help keep the weft exactly where you need. If you are lucky enough to have an assistant have your assistant hold the weft in place.
- You want to triple, Yes I said TRIPLE stitch the very first section of hair onto that first bead.
- This bead has the most wear and tear over time and is where you will find most extensions start to lift. It's super important to thoroughly tie the weft onto the FIRST and LAST bead of a section to ensure a FLAT lay. Ensuring that the extension stays as FLAT as possible is KEY to a long lasting installation!
- Continue stitching until through the weft and bead until you are at your last bead.
- Remember to TRIPLE stitch the last corner bead to increase the longevity of the installation.
And that’s it! You are done installing. Feel free to trim and style your client's hair as needed.
Its been two months! How can I reinstall this?
The best part about this type of installation is that the reinstall is INCREDIBLY FAST! As a stylist, you NEED to offer this type of installation due to the ease of the reinstall. All you have to do is find the extension, unclamp the beads and slide them up. Once you have retightened the beads you are done!
How can Glam Seamless support you in this?
We offer all of the tools you will need to install this method and they are ready to ship and be at your door ASAP! We have partnership options available for anyone interested, here!
Sources:
Cordero, Lorena D, and Ti-Aajia Palmer. “Lunch Break.” Glam Seamless Hair Extensions, Glam Seamless, Accessed 9 May 2019.
Harris, McKenzie. A New Painless Weave Technique: The Braidless Sew In. Rolling Out, 3 Sept. 2011, rollingout.com/2011/09/03/a-new-painless-weave-technique-the-braidless-Sew In/.


